Ticket System Integration
Table of contents
Introduction
With the App version 2.7.0, tickets can be created directly within the app and transferred to the app backend via the synchronization process. The creation dialog is based on ticket entry from FSM (Field Service Management) and allows you to enter the title, ticket type, status, description, and associated machines, materials, and documents. In addition, technicians can access existing tickets via FSM online views and edit them if necessary.
Create and transfer tickets
You can find a description of how to create tickets under Mobile App - Tickets . There are two ways to access the dialog for creating tickets within the app: either via a button in the assignment options or via a button in the detailed view of a machine from an assignment.
The display of these buttons can be enabled or disabled in the Admin Console (see Configuration in the Admin Console).
Unlike the ticket dialog in the FSM online views, this creation dialog is offline-capable and deliberately kept simple to enable quick and ergonomic creation of new tickets.
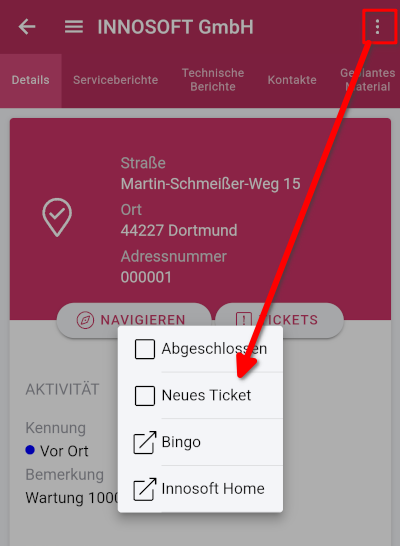
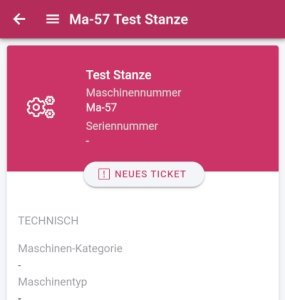
In both cases, the new dialog box appears. If the dialog box is opened from the detailed view of a machine, the corresponding machine is already assigned to the ticket in advance.
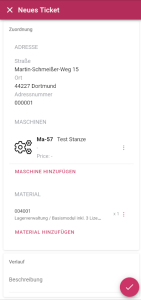
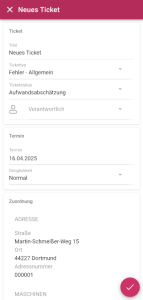
The deadline is preset with today's date and the urgency is preset to "Normal". The address from the assignment is also assigned and cannot be changed later.
In addition to the title and ticket type, you can also optionally set the ticket status and hotliner. You can hide both fields in the admin console and configure the list of selectable entries (see Configuring the Status List and Configuring the Hotliner List). If these fields are hidden, a default value for the ticket status specified in the admin console is used and the current technician is set as the hotliner.
Optionally, machines and materials can also be assigned. The machines that can be selected are limited to those from the assignment and project (Masch and Actionplanned) from which the dialog was called. In addition, the number of machines that can be assigned to a ticket can be limited (see Configuration in the Admin Console).
Only texts of the "Description" type can be entered in the "History" section. Other history types such as "Repair" or "Remark" are not possible with this dialog.
Furthermore, any number of documents can be assigned to the ticket. A special feature here is that you can specify whether it is an external document. If this is the case, it will also be displayed in the Customer Portal.
After confirmation in the dialog box, the tickets are stored locally and transferred to the app data during the next synchronization. Until then, tickets created offline cannot be edited or deleted retrospectively. This requires access to the online view of ticket entry from the FSM, which has been adapted for the app (see following section).
Viewing and editing tickets
An FSM online view integrated into the app gives technicians additional settings options when creating and editing tickets, as well as an overview of their tickets. This view offers almost all of the options you are familiar with from the FSM. However, this requires an existing online connection to the app backend.
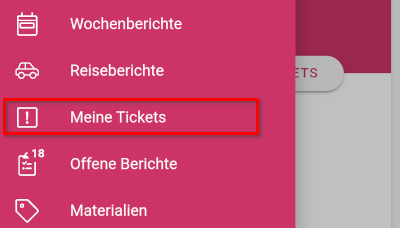
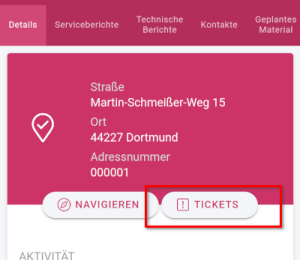
The view can be accessed in the sidebar via "My Tickets" or in the assignment details via the Tickets button. These two menu items can also be activated or deactivated individually in the Admin Console (see Configuration in the Admin Console).
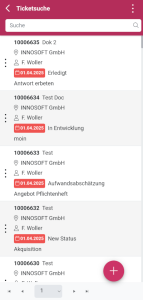
This view corresponds to the ticket search of the FSM and also allows you to restrict the tickets displayed using the search function above. It shows an overview of the tickets entered or assigned to the technician. If the view was called up from an assignment, the list of tickets displayed is additionally restricted to those related to the project from the corresponding assignment. In addition to editing tickets by selecting an item from the list, the ![]() button can also be used to create new tickets, which offers more options than the in-app dialog for ticket entry.
button can also be used to create new tickets, which offers more options than the in-app dialog for ticket entry.
Configuration in the Admin Console
All of the above options for recording and accessing tickets can be configured in the Admin Console. New options for this are available under "Customization / General" in the "FSM Portal" and "Tickets" sections.
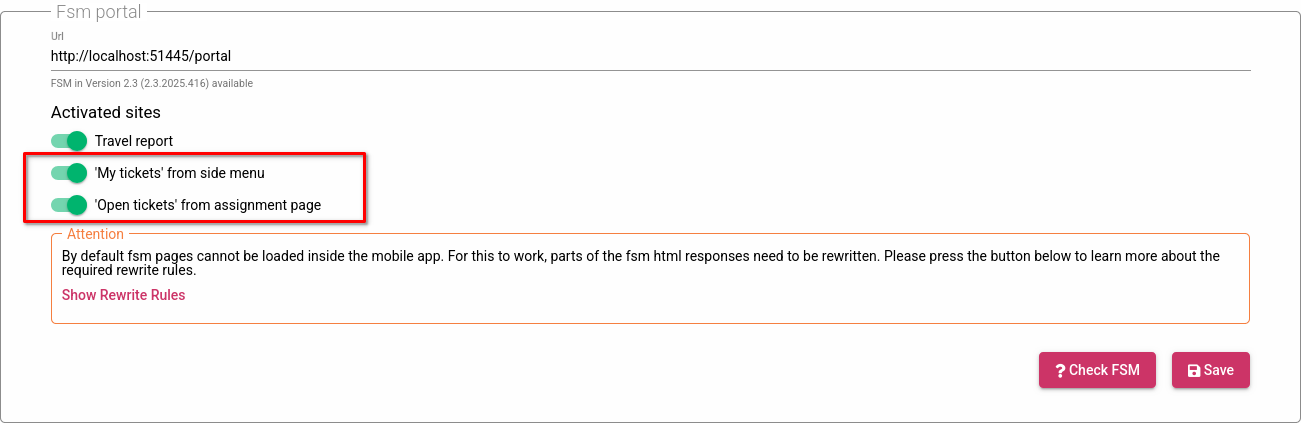
Accessibility to the ticket view from the FSM can be activated individually for the My Tickets button in the sidebar or the Tickets button in the assignment. If both are deactivated, the web view for tickets in the app is completely deactivated. General information on integrating external FSM online views can be found in the article Integrating FSM pages into the Mobile App (Technical Details).
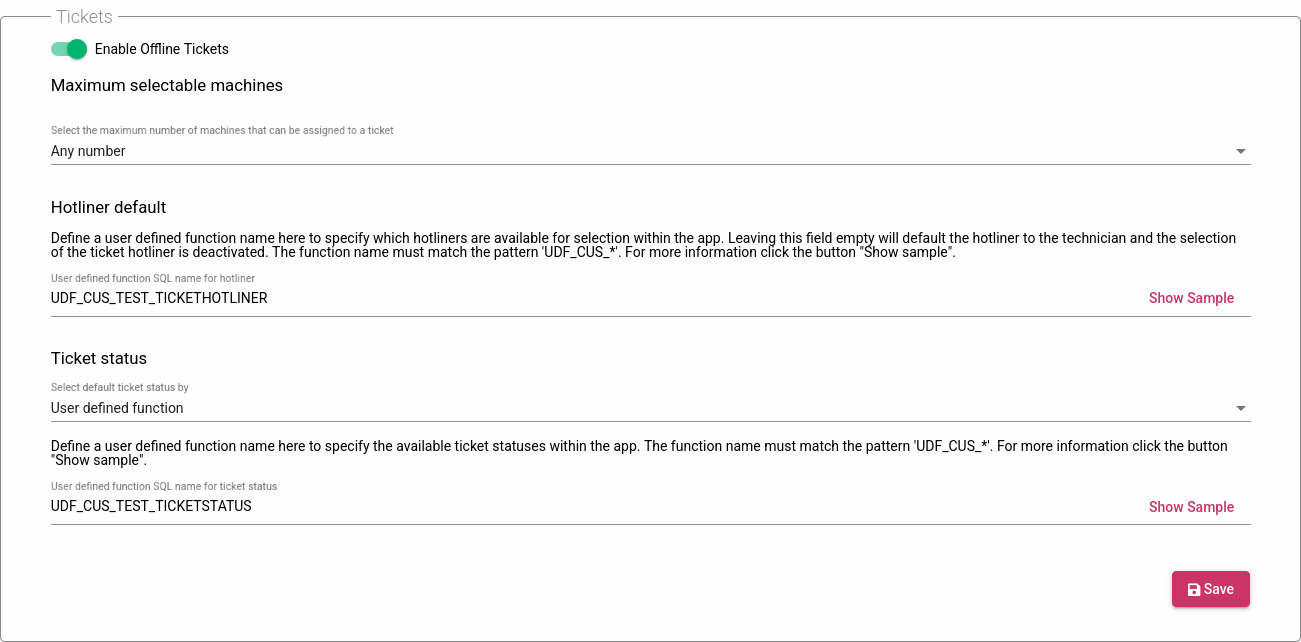
In addition, the in-app dialog for ticket creation can also be configured or completely deactivated in the app backend. Here, you can specify the maximum number of machines that can be recorded (none, at most one, or any number) as well as define the values in the selection list for the hotline representative and the status.
Configuring the Hotliner List
If you want to enable the hotline technician to be entered in the dialog, the selection list can be defined using a UDF (user-defined function). This can also be specified depending on the selected ticket type. If no UDF is specified, the respective technician is set as the hotline technician by default.
The UDF must return a table with two columns for the group IDs (OPTION_G.GRNR) and the hotliners (PWUSER.NAME), whose entries should be selectable in the app's offline ticket creation dialog for the specified ticket type (pkey).
Blocked hotliners are subsequently filtered out of the returned list (from PWUSER via PWZUSATZ).
This function expects several parameters with the types listed below, all of which are optional and can be specified in any order:
ressnr (nvarchar(10), null): Contains the resource number of the technician.
ogrnr (int, null): The technician's main group ID.
stammogrnr (int, null): The technician's master group ID.
pkey (nvarchar(10), not null): The primary key of the ticket type for which the specified hotliners should be selectable.
The function must return a table containing the following columns:
name (nvarchar, null: The name of the hotliner (corresponds to PWUSER.Name) that can be selected in the app for the pkey. Must not be null if grnr is null. Hotliners that are not found in PWUSER are skipped.
grnr (int, null): The group ID (corresponds to OPTION_G.GRNR) that can be selected in the app for the pkey. Must not be null if name is null. Group numbers that are not found in OPTION_G are skipped.
The returned table must meet the following properties:
If only either a user or a group is returned, the other column should be set to null (e.g., (‘doe’, null) or (null, 123)).
If both the user and group columns are returned at the same time, then both are assigned to the ticket type ID (@pkey).
The columns name and grnr cannot both be null.
Example
Here is a small example with an UDF for the hotliner:
CREATE OR ALTER FUNCTION [dbo].[functionName] (@ressnr nvarchar(10), @ogrnr int, @stammogrnr int /*, @pkey nvarchar(10)*/)RETURNS TABLEASRETURN( SELECT P.NAME as name, null as grnr FROM PWUSER P WHERE P.NAME NOT IN ('roe', 'doe') UNION SELECT null as name, G.GRNR as grnr FROM OPTION_G G WHERE G.LANGUAGE = 0 AND G.GRNR NOT IN (1, 2, 3));Configuring the Status List
If the ticket status is also to be recorded in the dialog, the selection list can be defined using a UDF (User Defined Function). Alternatively, a one-time status can be defined as the default for all tickets recorded in the app.
This UDF must return a table of ticket status IDs (PROSTATUS.PROSTATUSKEY) that can be selected in the app's offline ticket creation dialog.
If the status is not released (PROKEYPROSTATUS) or if the technician does not have the appropriate permissions to read the status (PROSTATUSUSER, PROSTATUSGR, PROSTATUSOGR), the status is subsequently filtered from the returned list.
The function expects several parameters with the types listed below, all of which are optional and can be specified in any order:
ressnr (nvarchar(10), null): Contains the resource number of the technician.
ogrnr (int, null): The technician's main group ID.
stammogrnr (int, null): The technician's master group ID.
The function must return a table containing the following columns:
prostatuskey (nvarchar, not null): The ticket status prostatuskey (PROSTATUS.PROSTATUSKEY), which should be selectable in the app. IDs that are not found in PROSTATUS are skipped.
The returned table must meet the following restrictions:
The prostatuskey column must not be null.
Example
Here is a small example with a UDF for ticket status:
CREATE OR ALTER FUNCTION [dbo].[functionName] (@ressnr nvarchar(10), @ogrnr int, @stammogrnr int)RETURNS TABLEASRETURN( SELECT S.PROSTATUSKEY AS prostatuskey FROM PROSTATUS S WHERE S.LANGUAGE = 0 AND S.GRNR NOT IN (1, 2, 3));